That's right, I'm at it again. I really have no idea how I have no problem sticking with one binder for two and a half years, yet I've switched inserts four times this year. Geez.
As I mentioned in this post, I made a switch from my hand designed day on two page inserts to the Filofax Cotton Cream week on two page inserts. I was really missing being able to carry the whole year with me and hating having any blank space on my super roomy Do2P pages. So I made the switch. It seemed to be going well, after all I could make the inserts as jam-packed with info as I'd like.
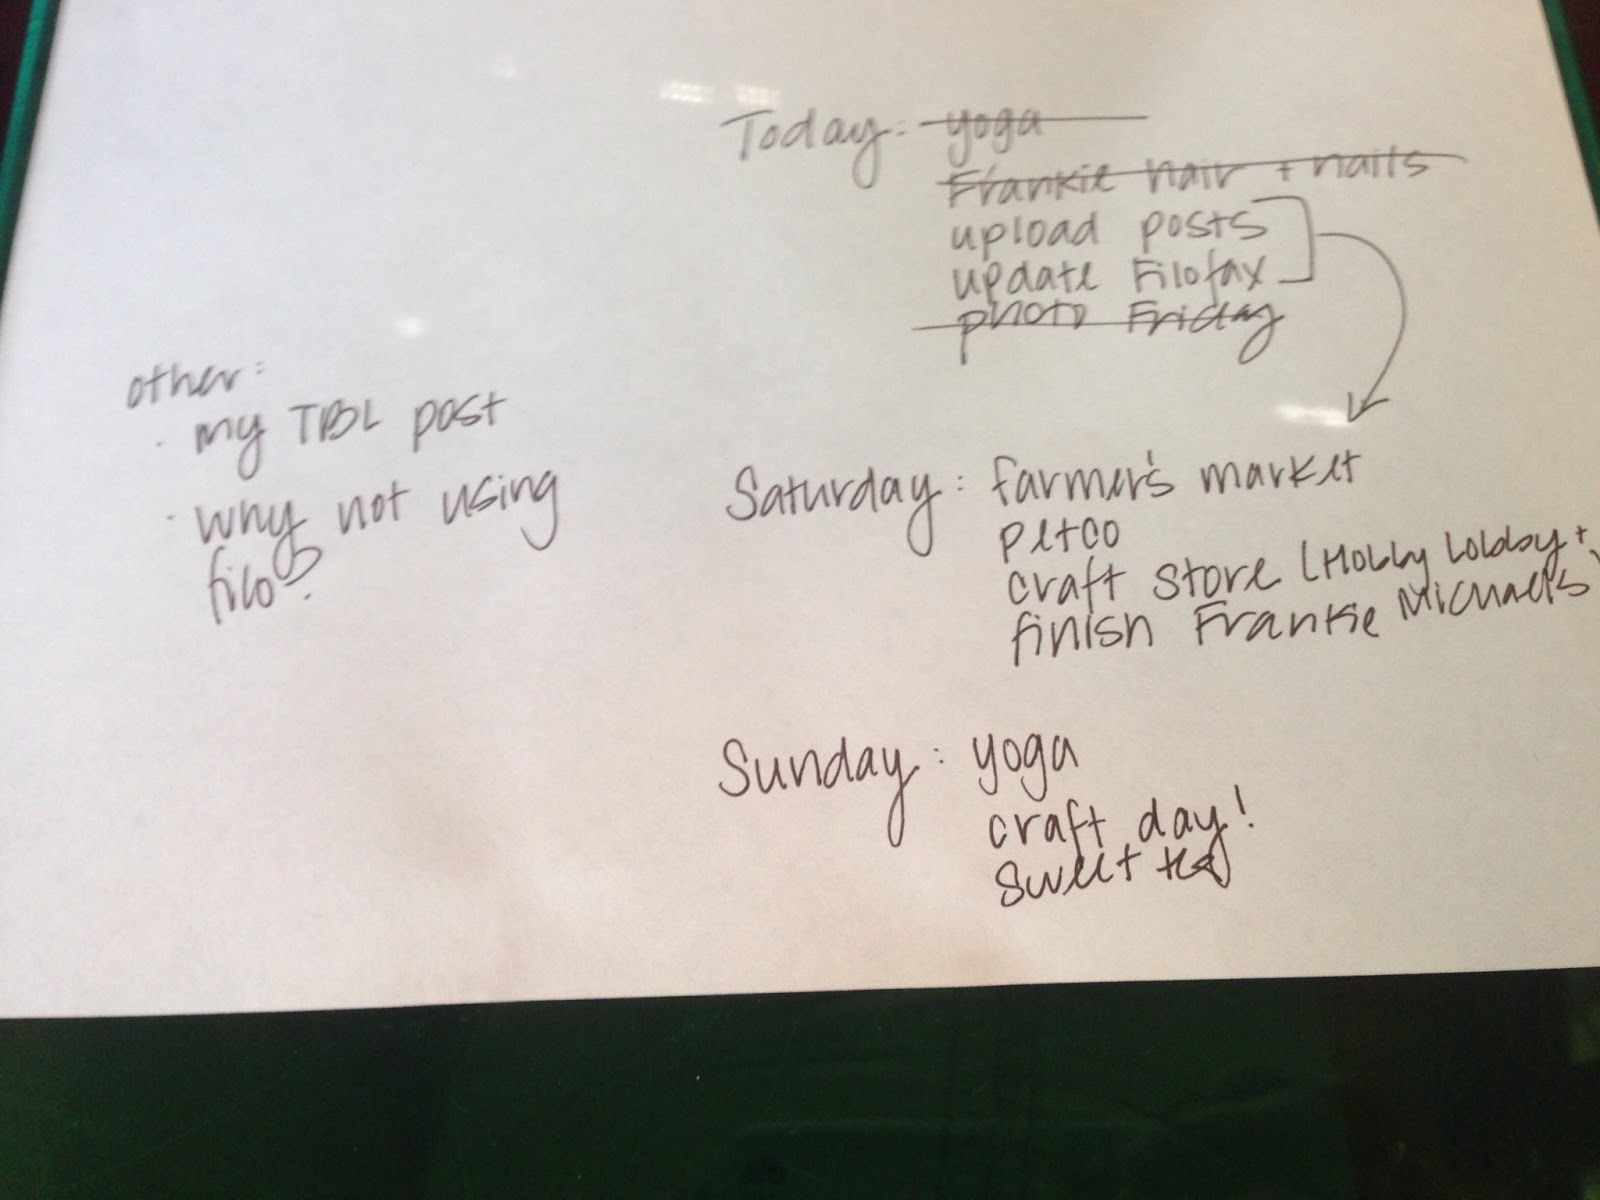
Until, that is, I realized I was also doing this:
Yep - for some reason I migrated away from my Filofax all together and started using scratch paper on a clipboard. Yick.
I knew I needed a change - obviously the Filofax pages weren't working if I was subconsciously moving away from using them. So, I placed an order for 2014 inserts online and to my excitement they had the 2013 inserts severely discounted. I grabbed a set of those as well, impatient planner that I am.
Since I'm delving a bit more into video, I thought it would be fun to do a traditional unboxing as the reveal for my new choice of inserts. And please don't get mad at me if you get motion sick - I didn't think about how difficult it would be to open the packages with one hand!
But if you're at work or otherwise are unable to watch the video, here's the scoop. I decided on...
Pause, for effect (a la Despicable Me)...
The Organized Mum week on two pages inserts! Aren't they beautiful? I'm totally in love with the clean design and font. While I go through the entire set in the video (all of the inserts included, etc.), I wanted to share some of my favorite parts and how I will be using them.
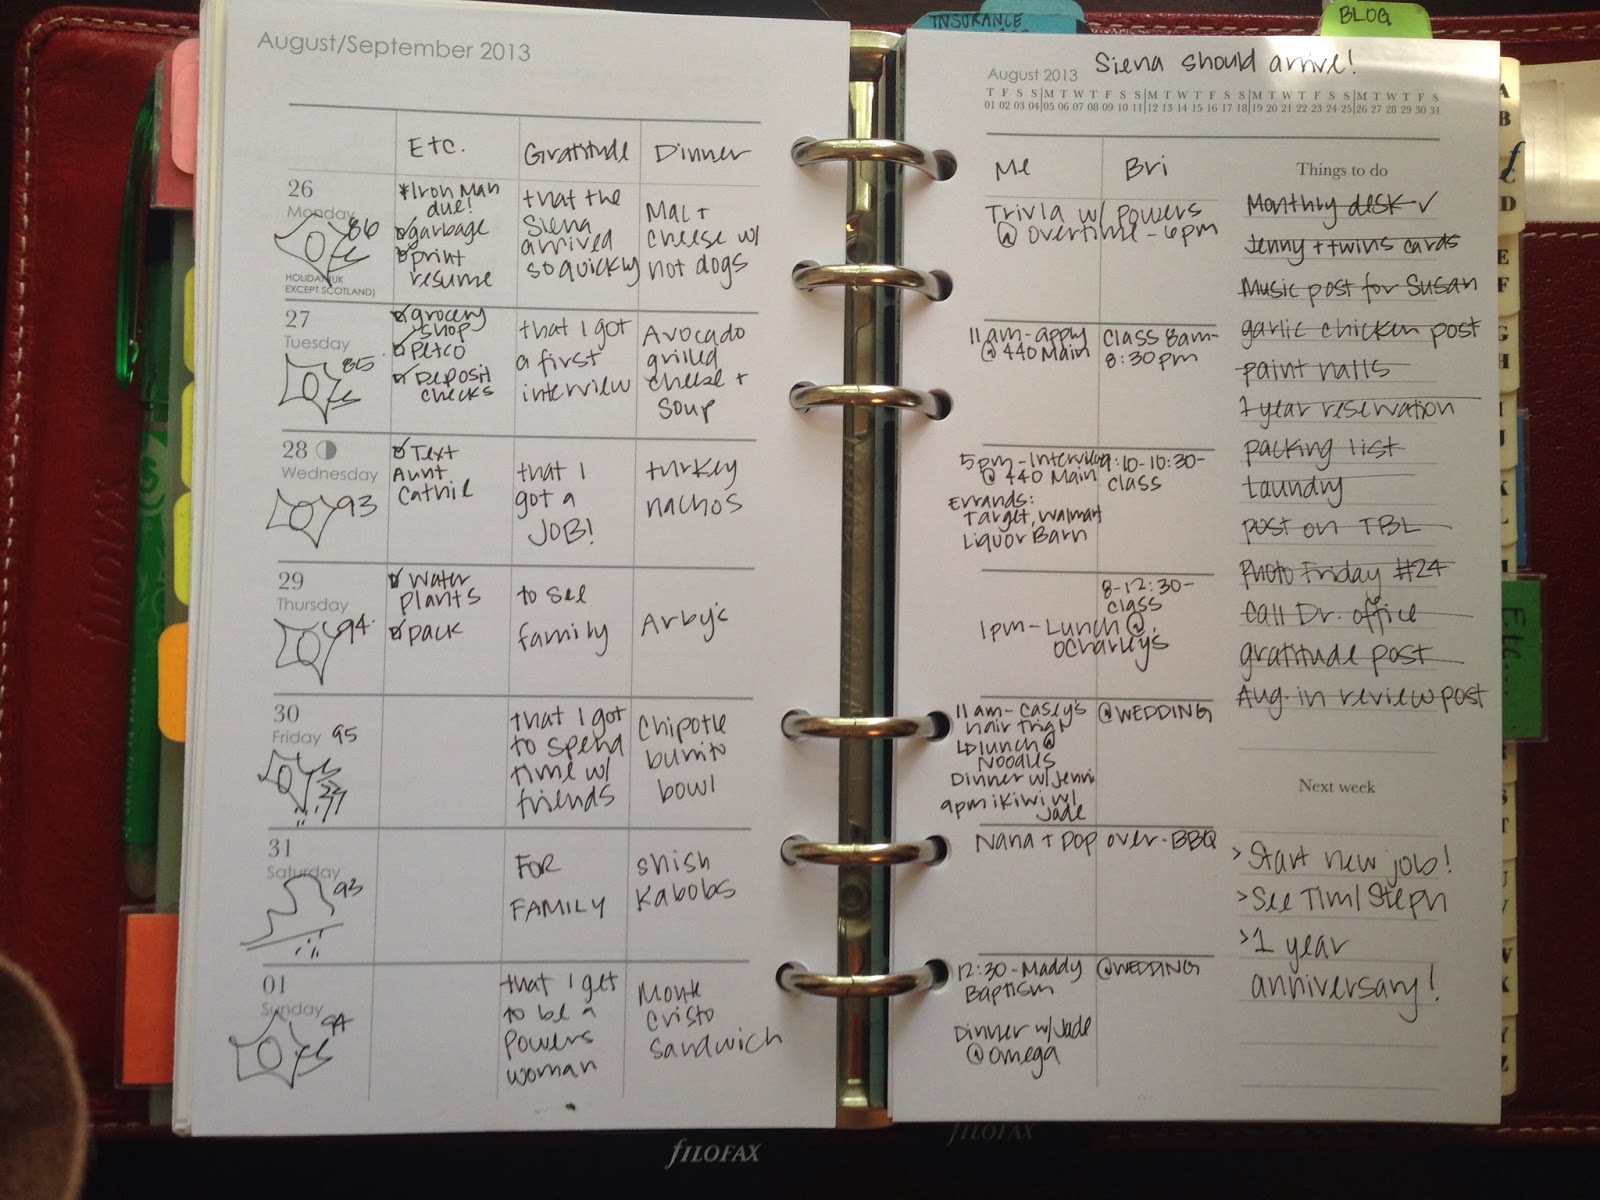
First of all, I'm really in love with the clean, structured look. Obviously I'm not a "Mum" (other than to Frankie) but I still have plans for how I'll use each section. As you can see in the photo above, the days are listed down the left column, with five additional columns for members of your family. Instead, I'll use them as follows: Etc, Gratitude, Dinner, Me, and Bri. The "etc" section will be used for day-specific tasks and reminders/info, i.e. Photo Friday blog posts or how much I made in tips at work each night. I just took the most popular items on my existing pages and gave them each their own column. This may change in the new year (sneaky me) but for now it seems to be working!
I'm also in love with the "next week" column - it is really nice to be able to see any upcoming deadlines, tasks, or appointments without even flipping the page!
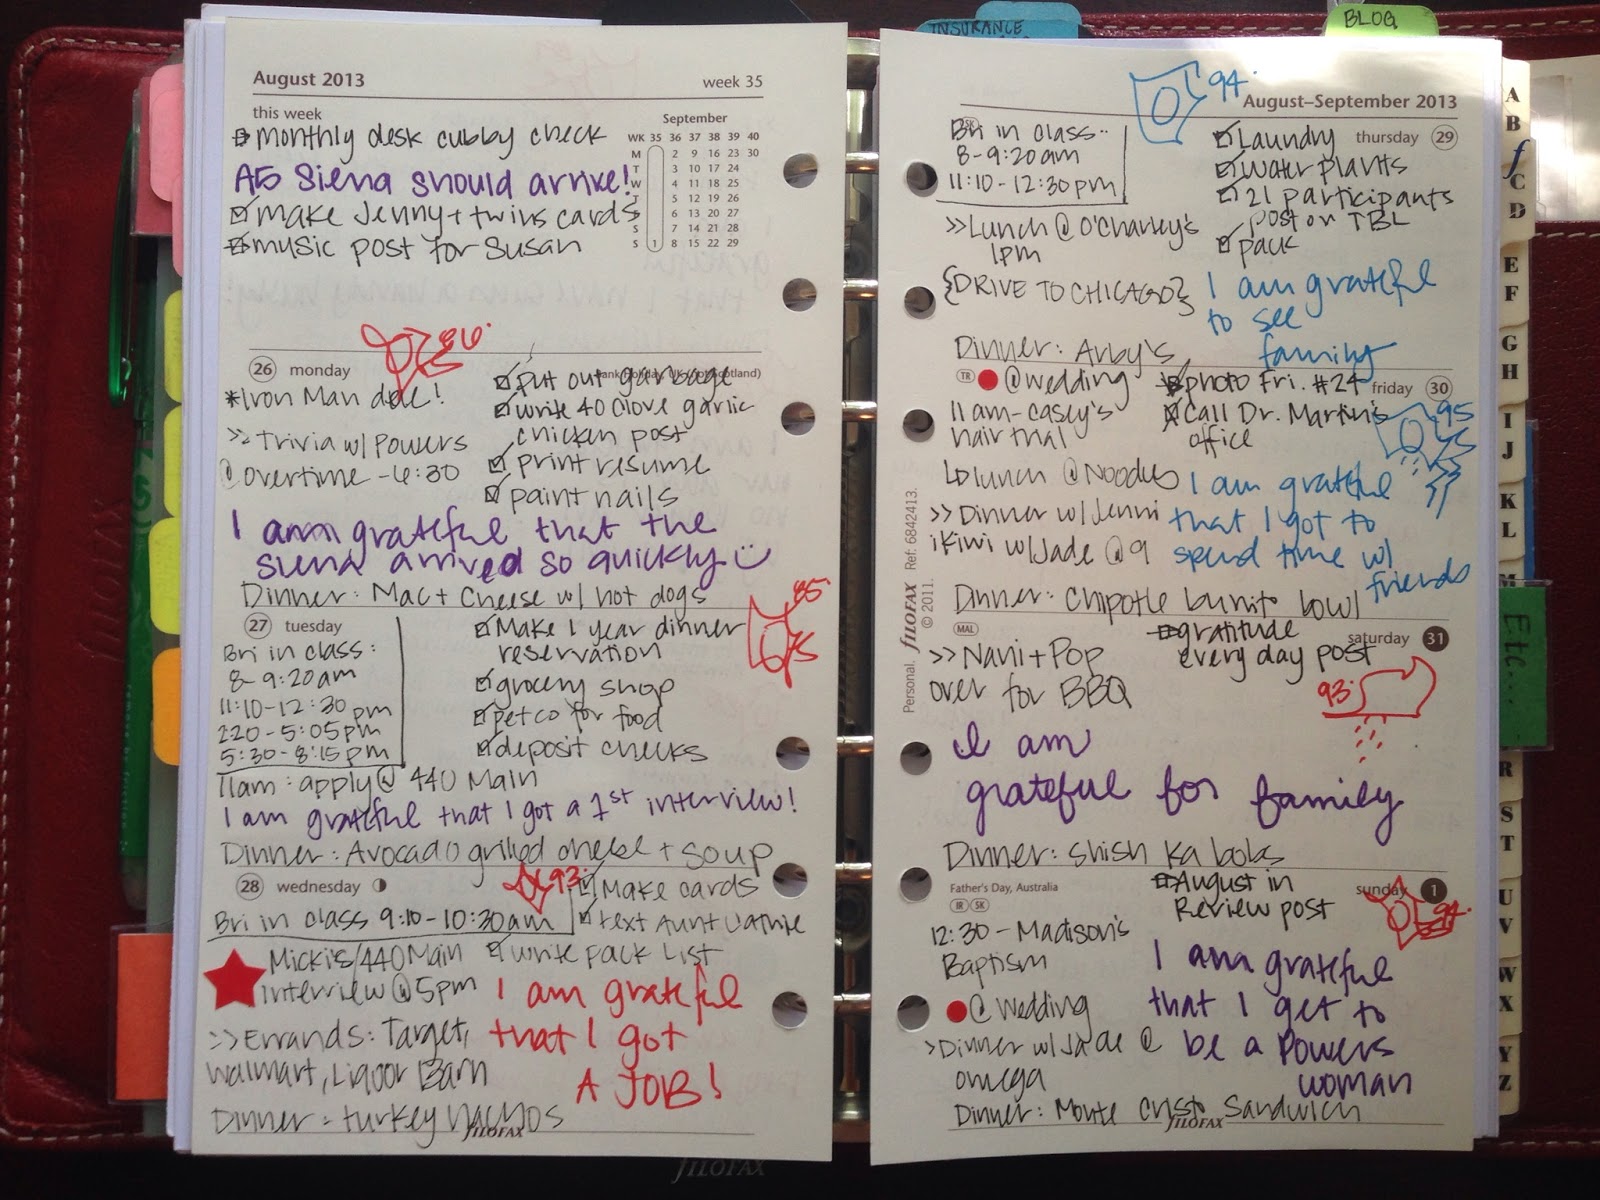
My biggest concern was over the small boxes - after all I measured each one at 19 mm x 20mm. So I did a test, and took an already complete week of my Filofax cotton cream week on two page inserts and copied the information into the correlating week of the Organized Mum inserts. Here are the results:
As you can see it isn't quite as colorful, but all of the information fit with room to spare. Not to mention that this format works far better for my brain - I'm learning I do much better with the information separated out categorically. Perhaps if I could stick to one color coding system things would be different, but oh well. I'm really liking being able to see everything separated out, tucked into their own little sections. Plus, I can always decorate the pages with color later. I've also used highlighter to mark off my tasks since this photo was taken which provides a bit of visual difference.
I'm not going to lie though, I definitely have to write small on these pages. But since I use the Sakura Pigma Micron 01 (.25mm) as my main planner-pen, it seems to be working just fine.
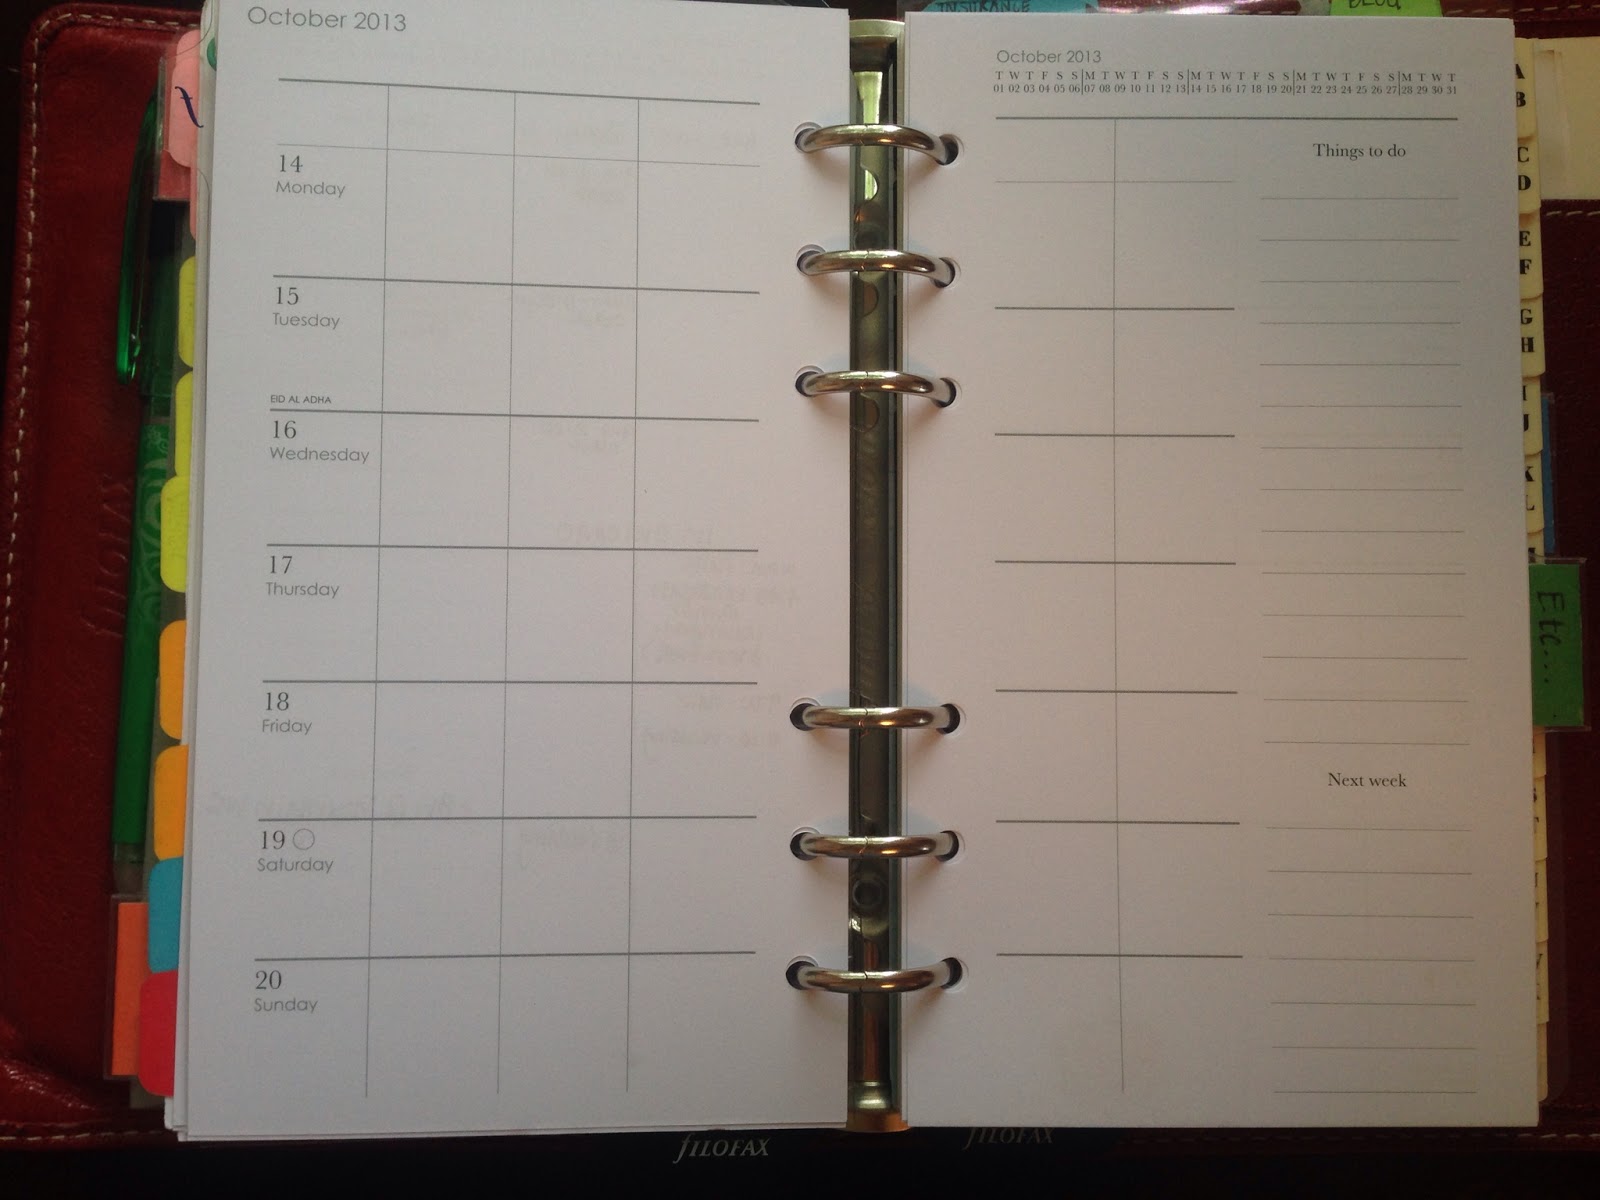
The inserts do come with a monthly calendar, though it has teeny spaces as it is a month per page. That is a standard sized paperclip in the photo above to show you what I'm talking about. Fortunately, I tend to not use the monthly calendars as much when I'm using weekly pages since I can carry the entire year of weeklies in there. For me, monthly calendars are much more essential for forward planning when I'm using a day per page or day on two pages since I can only carry about three months of daily pages at a time.
Instead, I plan to use the monthlies to track bigger things, like trips or all day events. As you can see, Brian has a week long workshop this month, and the other dates are blocked off due to all day events. That way, I can quickly flip here to see what the overall month looks like, then easily flip to the weekly page for details.
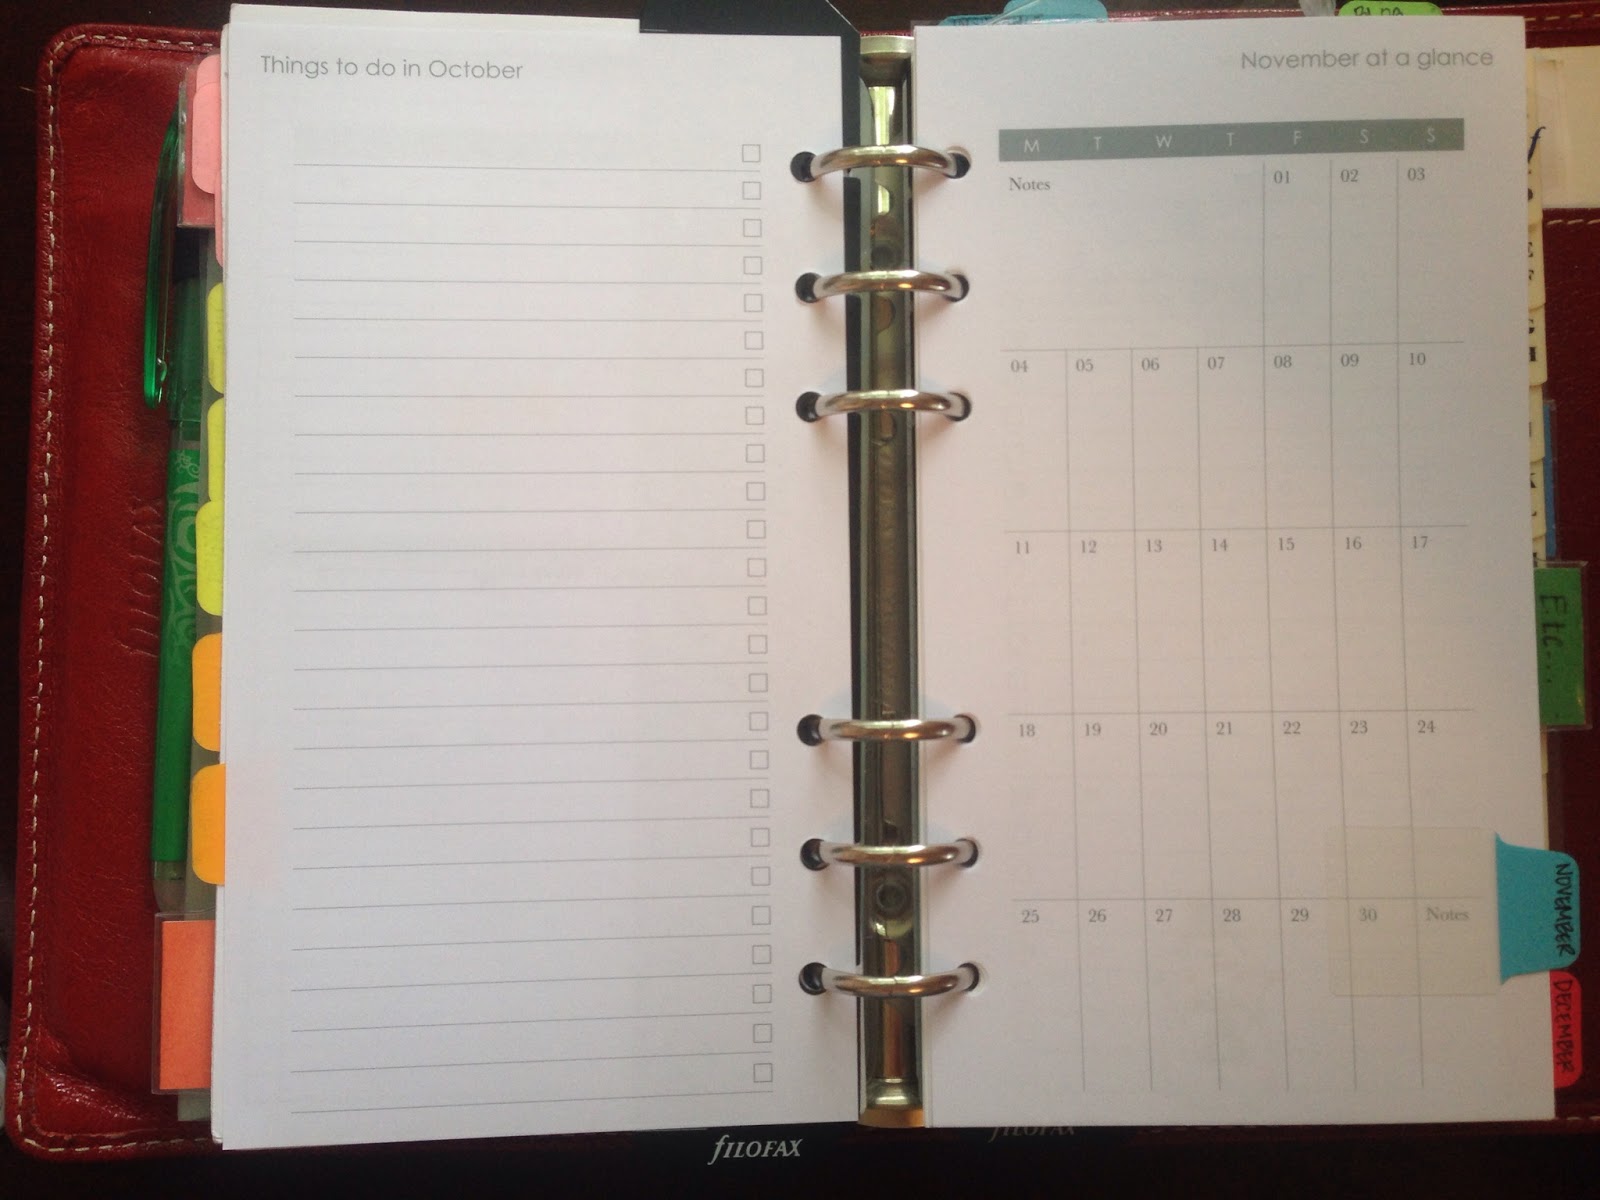
The only thing that might take some getting used to with these inserts is how the monthly page and monthly task sheet are set up. Instead of having the month and that month's tasks in one view, it is laid out to where "things to do in October" is followed by the "November at a glance." The December task list is on the back of the November calendar, etc. While I'd personally prefer to see them on the same page, I think I'll get used to this set up pretty quickly.
The set came with several other useful inserts, but I'll skip the photos as they are all detailed in the video above. I know that many of them, especially the vehicle information sheet and frequently used phone numbers, will be very useful!
So far I'm quite smitten with these inserts! I'm not sure of the paper weight, but I haven't experienced bleed or show through with my Micron pens or a highlighter. Which is much more than I can say for some other inserts I've used! Granted, I just got these on Monday, so I'm at less than a week of use. You know I'll keep you updated as to how they work out long term.
Any of you readers too impatient to wait until 2014 for a planner switch?
To be clear, I paid full price for these inserts (£7.99 for the 2014
set and £1.00 for the 2013 set) and the opinions here and in the video
are all my own!
Labels: Filofax, Malden